tail gate is on, but...
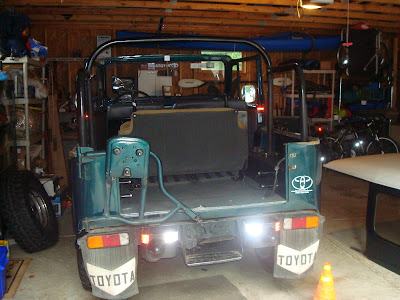
Well , after attacking the last bolt from every angle I finally got it out.. I also could not wait to get the tailgate on to see what it looks like. What do you know the holes dont line up that well... I guess I will have to enlarge them a little to make things look right. Anyway I will take a photo tomorrow in the light when I take it for a spin. I am getting close to putting the soft top on but first I am going to do a little POR action on a few spots. mybj40 is not perfect but it is perfect for me.
well tailgate arrived from CCOT
Well after looking at tale gates I went with the one from CCOT because I was also ordering a couple of other parts like their windshield brackets. Anyway, go that the other day and well I begin cleaning and prep work on the body and taking off the Aby door bottom striker plate. Man that is a pain in the ___. I dont know now other people can get some other these things off. No wonder most people stay with the soft top once they get all these bolts off. 4 hours later and I am still needing to remove one bolt. I did clean and started my painting of the interior gas panel. Over all it was in great shape. Just wanted to clean it, paint my gray interior color I am going with. Next I will remove the seat backs and paint them.. Also I lucked out CCOT messed up my order and they sent me the hood hooks instead of the Window hooks I ordered. O well. they said to just keep them. lots of dirty fun.... I still need to drive her now that the top is off.
Top off clean up - mybj40
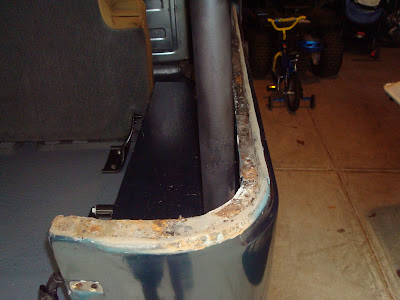
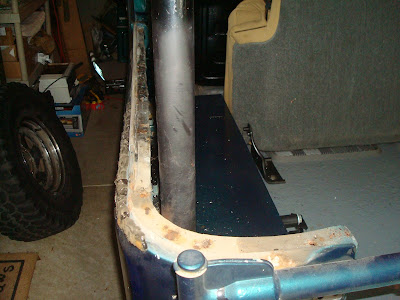
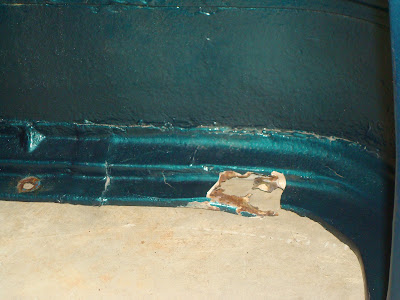
Well now that the top is off , I am ready for the clean up and rust treatment with POR in every spot I can get too. Here is the before shots.... The worst place in the back area in this next photo, it seems like some real good surface rust but other than that ,, looks pretty good... There was still even some hard top seals under neath the rubber had turned into a brick and fell apart in my hands.
Part 4 - top off mybj40
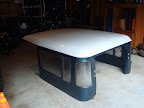
Well Here is the Top on the ground after 3 guys picked it up...
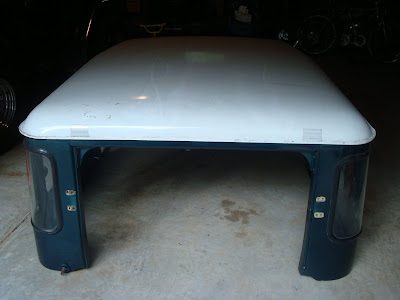

The bad thing is that the legs snapped right off when I set it down. They were rusty at the joints and pretty much fell off. O_WELL. Anyway the top is real clean other than a couple of spots. I am going to built a sling to hang it from the garage .. Mybj40 is coming right long. Next up clean up....
New looks....
Part 3 - Hard top almost off
Well after pushing and pulling for 30 min, I took of the door strikers and WD up the rods that go into the body thing one of them must be stuck. Then pushed and pulled some more, then decided to strong arm it. I got up in side the truck and placed my back up against the hard top and pushed. Nothing.... So I pushed real hard on one side and POP ! maybe I missed a bolt, or maybe it was bondo under one of the sides..... Yea you guess it bondo over on one of the sides behind the roll bar.
Well at least it was a clean break with no other fractures that I can see. Now the top is ready to come off. I think I need a second person for sure.
So while I wait for another strong back, I went a head and started painting some parts grey. I am starting with some small parts and I am working up to larger ones learning a good painting technique. Next will be the gas neck cover and the seat backs.
top removal part 2 - rusty bolts
So I jumped right in where I left off removing the passenger side aby door. First I have to disconnect the license plate lights. I was pleased to see that they were just twisted together with black tape. No problem... Then started up bolting the door and again having the right size mm socket is the most important. Again the upper bolts were easy but the bottom bolts run through the tub and have rusty nuts on the other side. This took me close to 1 hour to remove the rusty nuts. I went ahead and started hitting other rusty things with WD. I went over all the bolts and looked for any problems. I could tell right off the bat that the upper door bolts were going to be a problem.. Anyway started removing the bottom tub bolts. and all went well only broke one off and it took me 2 hours to remove the other back bolts that went all the way through the tub rail. I dont think they are supposed to be like that. I ended up having to drill out one of the front screws that hold the top to the windshield, that was a long process which I would not want to repeat anytime soon.
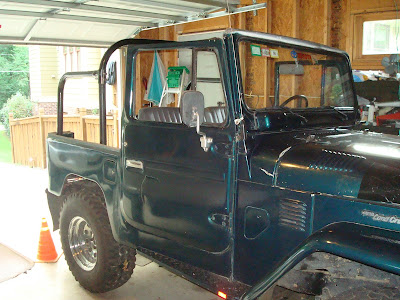
ahh the top removal part 1 - mybj40
Well I have begin taking the top off after buying the best top and thinking about it for a while. I agree with everyone , take her top off every once in a while. I am amazed at how nice my amby doors are ... They are so clean all the way down to the seals. I am so lucky.. Anyway I am going to build a host to lift it off and leave it off for the summer. Then I back on in the winter. I was able to get one of the doors off tonight and will get the other off tomorrow. I also sprayed WD on all the tub bolts. I think I am going to have to get some stronger stuff for some of the other rusty bolts. I will take some shots tomorrow when I begin getting the rest of to top off. I think before I put the softtop on I am going to do a little clean up and POR !!
